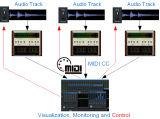
This tutorial shows how to use the Remote Control MIDI control surface and DP Meter Pro audio analysis plugin (DPMP) to monitor and control several tracks in a same screen. Before you read this tutorial, please read the Remote Monitor tutorial first and reuse the same project as a basis for this tutorial.
The principle is to add gain plugins from the freeware Gain Suite and control them with the Remote Control user interface which we already used to monitor the same tracks:
This tutorial uses Cakewalk Sonar 6 as a host application, but any directX or VST compatible host that supports MIDI routing will work. See our DP Meter Pro Tutorials for more information about how to use MIDI routing in other applications such as Ableton Live, Steinberg Cubase, Energy XT etc.
Step By Step
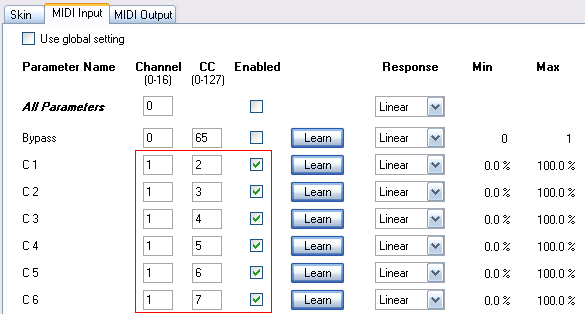
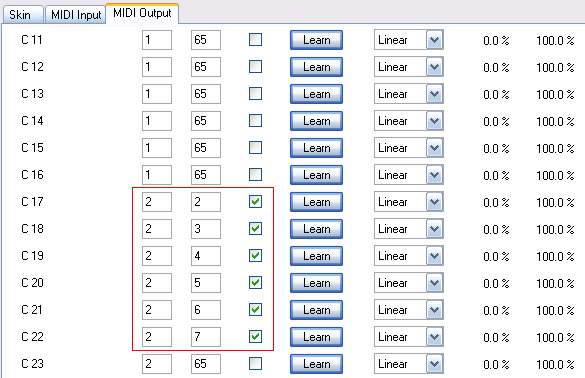
00 - Preliminary step - open the Remote Control preset settings and check that you have the following MIDI input setup:
01 - On each track you monitored in the previous tutorial, insert a gain plugin (mono or stereo depending on the track):
.png)
02 - Check that the gain plug-in is inserted BEFORE the Digital Peak Meter Pro (DPMP):
.png)
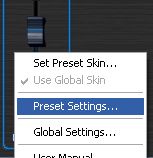
03 - For each inserted gain plugin, open the presets settings window:
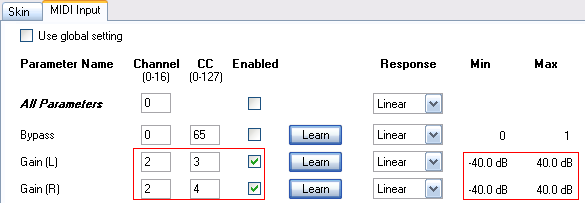
04 - Assign the Gain input parameter to the same MIDI CC as the DPMP output, but on channel 2 (avoids conflicts), and change the dB range:
, and change the dB range.png)
04.1 - Example for a stereo track:
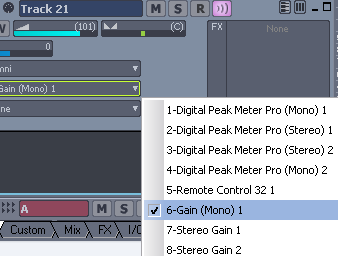
05 - For each monitored audio track, create a MIDI track and setup th egain plug-in as output:
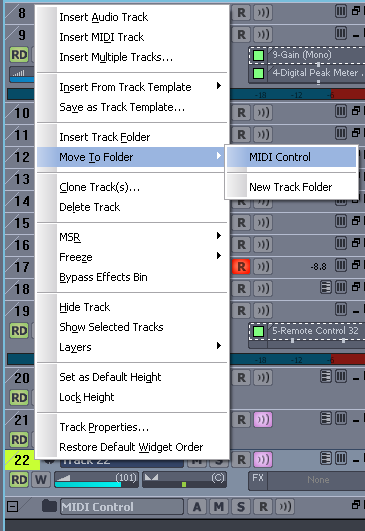
06 - In Sonar 4 and above you might want to group all your MIDI tracks in a folder:
07 - In the Synth Rack view, Enable MIDI output for the Remote Control 32 plugin:

08 - Enable:
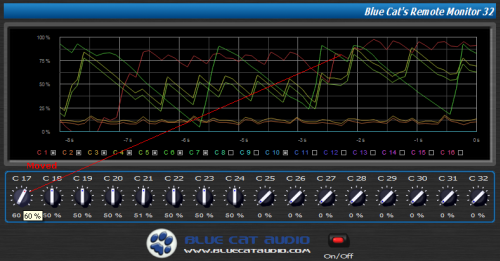
09 - Set first control knobs to 50 percent, since it is the neutral position for the gain plug-ins:

10 - Moving the knob now modifies the track volume, which is visible on the graph:
11 - Here is what you obtain with the blue meters skin - a custom mini console:
You are now able to control and monitor several tracks volume in a single screen thanks to the DP Meter Pro and Remote Control plugins MIDI capabilities. What about customizing your user interface with Blue Cat's skinning language, or controlling and monitoring other parameters (RMS level, Mid/Side level...) with our other Audio Analysis tools.
Again, another trick is to apply the same tutorial on a two computers setup: if they are both connected with a MIDI interface, you can then control and monitor a computer from the other one.
Any questions, comments? You want to submit your own tutorial to win a free license? Please post on our Forum!

