
Blue Cat’s Axiom, Late Replies, Patchwork & MB-7 Mixer plug-ins all come bundled with a long list of built-in effects, including this unique Reverb plugin. Learn more about reverb settings, how they influence the sound of the produced reverberation, and get started with some good basic settings for different uses.
Parameters
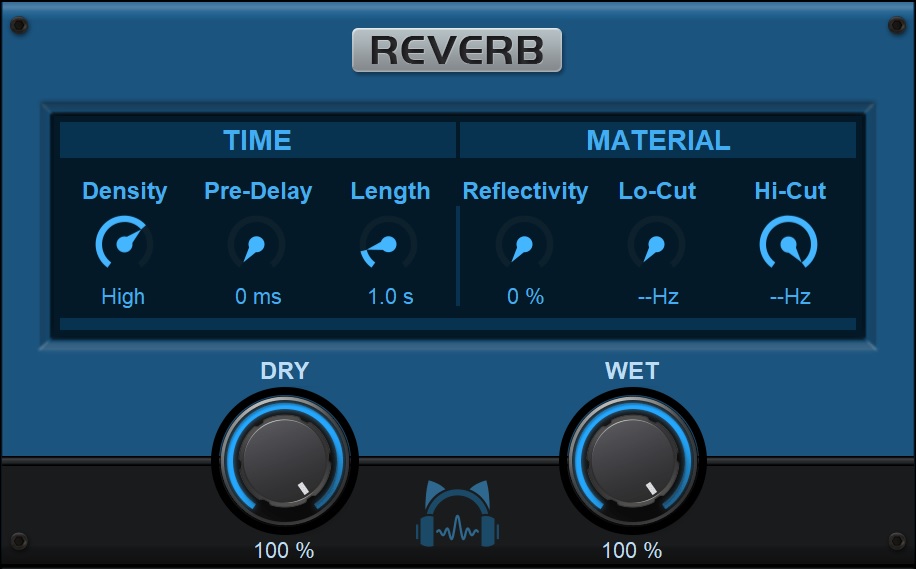
This reverb has 8 parameters, here is a short overview on how they influence the sound:
- Density: controls the density of the reflections. We could also call this “smoothness control”. Note that the larger settings also consume more CPU!
- Pre-Delay: time in ms before the reverberation starts. To avoid loss of definition, especially on vocals, this setting allows you to let the reverb come in later and still keep your initial attack intact.
- Length: the duration of the reverb. At ∞ (infinity), you will end up with an infinite reverb, which can be very useful for special effects.
- Reflectivity: see this control as a surface and material control of your virtual walls. Lower settings = softer materials and so less reflections. Higher settings = harder materials and more reflections.
- Lo-Cut: minimum frequency of the reflected sound.
- Hi-Cut: maximum frequency of the reflected sound.
- Dry: amount of dry signal.
- Wet: amount of wet or reverb signal.
So where do we start?
This is all very nice, but how do we get started making our own presets and what’s the best setting for each instrument?
You can either start with existing presets and tweak from there, but here’s how you can do it simply, by understanding how each parameter influences the sound and some basic guidelines. To make things easy, we have made a few diagrams to show the workflow. This is of course just a set of guidelines: be creative and experiment with your own settings!
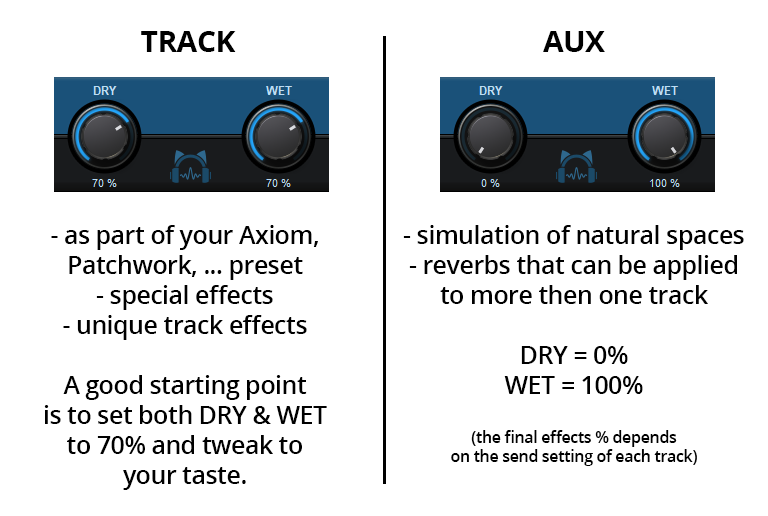
1. Track or AUX ?
First of all, ask yourself if you’re going to use Reverb as part of an integral Axiom, Patchwork, etc. preset, on an instrument track (as an insert) or on an AUX channel, to apply the effect to multiple tracks at once?
Note that Reverb isn’t directly available as a VST plugin inside your DAW, you’ll need to load Axiom or Patchwork first and then load Reverb as internal plugin in the desired location. The end result is exactly the same.
2. Reverb type
The most confusing part is to choose between all the different reverb types, and which one fits best your instrument or music. While your ear is your best guide, here are a few examples that can help you to get started:

3. Adjust your tone
Once you have the right settings for your reverb, adjust the tone of your reverb using the Low & Hi-Cut and the Reflectivity parameters.
- Warm Reverb = remove high frequencies using the Hi-Cut and use a lower Reflectivity setting
- Bright Reverb = remove low frequencies using the Low-Cut and use higher Reflectivity settings
4. Less is better
It is (unfortunately) very easy to overuse reverbs: start with very low WET settings first, and pay attention to the actual content of your music. A reverb can add dimension and stereo width to your project, but when settings are too high, the mix will start to sound dull and loose definition.
5. Examples
Here are a few examples of the above settings in action, enjoy!
0:13 Reverb On Grand Piano
0:53 Reverb On Drums
1:17 Reverb On Vocals
1:46 Reverb On Full Mix


Thanks sir, I’m new producer From 🇧🇮 Burundi
I will become big producer with your plugs, I will thanks sir.
By the I’m Nomo pro Bdi