This tutorial shows how to reuse the envelopes generated by our plugins with output parameters in Cakewalk Sonar using groups. Other techniques exist (using MIDI or Automation curves), but this one has the advantage of being simple and completely integrated into Sonar’s workflow. It also lets you use plug-ins that do not support MIDI control as destinations.
This step by step tutorial has been created with Sonar X1, but it will work with previous versions of Sonar (starting with Sonar 6). This technique can also be applied to other host applications that have such parameter grouping capabilities.
In this example we are using the DP Meter Pro plugin (DPMP) in order to control the gain of a destination track, according to the envelope of an other track (source). You can of course use the same technique to perform other side chain tasks in Sonar with any of our plug-ins with output parameters.
Step By Step
01 – Insert the DPMP plug-in on the source track:

02 – Insert the Gain Plug-in on the destination track:

03 – On the DPMP, open the preset settings window:
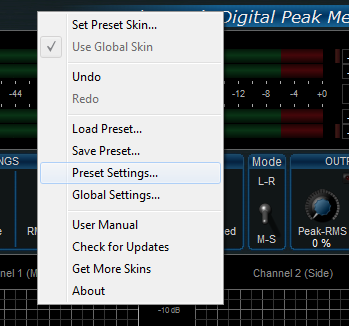
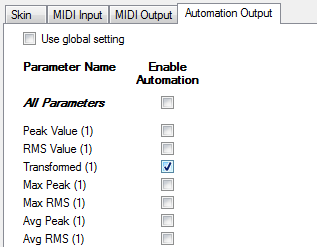
04 – Enable automation output for the transformed envelope:
05 – Open the Synth rack (in Sonar X1 it is now available in the browser):
.png)
06 – Unfold the controls views:
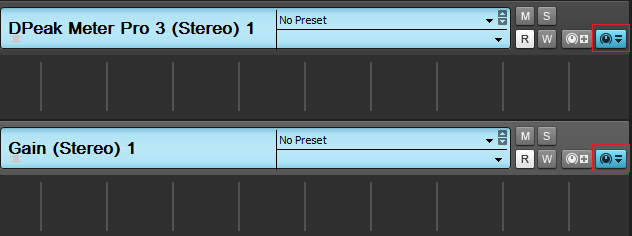
07 – Right Click on the controls view and select the transformed envelope output for the DPMP:

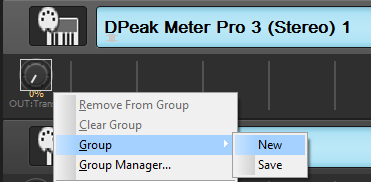
08 – Right click on the control and create a new group:
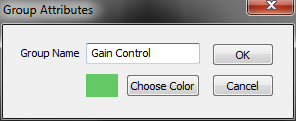
09 – We will call this group ‘Gain Control’:
10 – Do the same with the gain plug-in and assign the gain parameter to the same group:
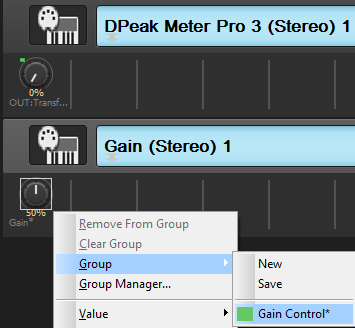
11 – The gain parameter is now controlled by the output of the DPMP:
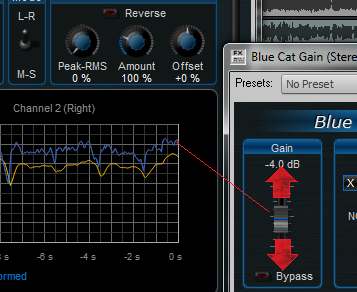
12 – But at this stage the gain control varies from -60 to 60 dB:
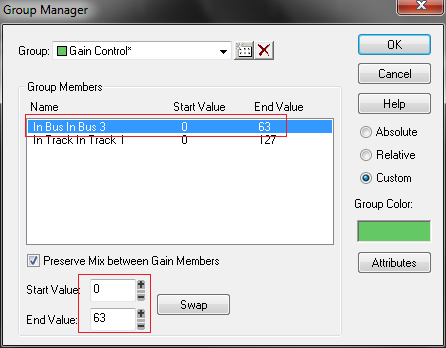
We want to control this range (and typically apply a -60 to 0dB gain only). Sonar provides a way to change the range of the controls.
13 – Open the group manager:
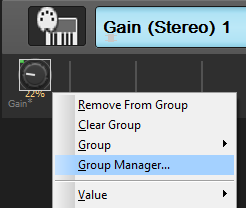
19 – Change the range for the gain plug-in:
20 – Done! You can now tweak the DPMP parameters to control the gain response:
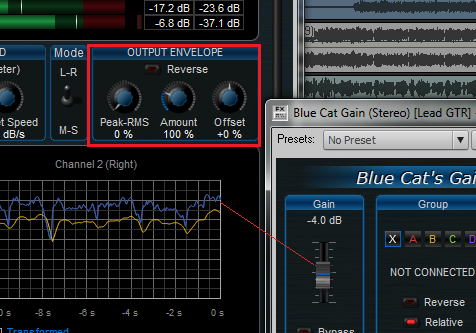
21 – Note:
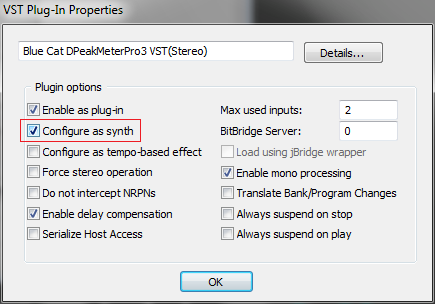
You can also use the VST version of the plug-in. In this case, an extra step is required so that the plug-ins are declared as synths (for some reason Sonar support controls on synths only). Both plug-ins (source and destination) have to be considered as synths. This extra step has to be done before inserting the plug-ins.
21.1 – Open the plug-in manager and open the properties panel for the plug-in:
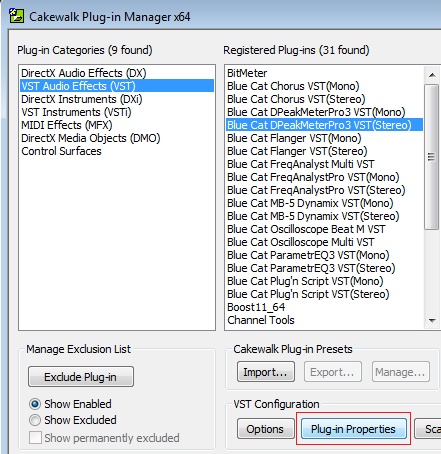
21.2 – Check the ‘synth’ option – the plug-in will now show up in the menus as a synthesizer:
You have learnt how to use the DP Meter Pro plugin (DPMP) with Sonar’s groups in order to control the parameters of another plug-in. This technique can be used with many other plug-ins of ours (as source and destination), for many purposes, including side chain compression, ducking, voice over, etc. You can check out our other Tutorials to see example of tasks that you can automate thanks to this technique.


